A Comprehensive Posing Guide for Photographers
Master the art of posing with this extensive guide; Learn techniques to flatter every figure, capture natural moments, and create dynamic interactions. From individual portraits to large group shots, discover tips for posing men, women, couples, families, and children. Explore advanced posing techniques and essential camera settings for stunning results. Elevate your photography skills today!
General Posing Tips for All Subjects
Before diving into subject-specific poses, remember these fundamental principles applicable to everyone. Good posture is paramount; it instantly enhances any photograph. Encourage subjects to relax their shoulders and stand tall, avoiding stiffness. Natural hand placement is crucial; avoid stiffly holding hands at sides. Suggest subtle adjustments like placing a hand on a hip or gently resting it on a leg for a more relaxed feel. Direct your subjects to engage in natural actions—a slight smile, a thoughtful gaze, or a gentle touch—to create authentic emotions. Experiment with angles and perspectives; a three-quarter turn often flatters the figure more than a straight-on pose. Remember that effective posing is a collaborative process; guide your subjects with confidence and patience, adjusting poses as needed to achieve the desired result. Consider the background and use it to your advantage; place subjects in a way that complements their pose and the overall composition.
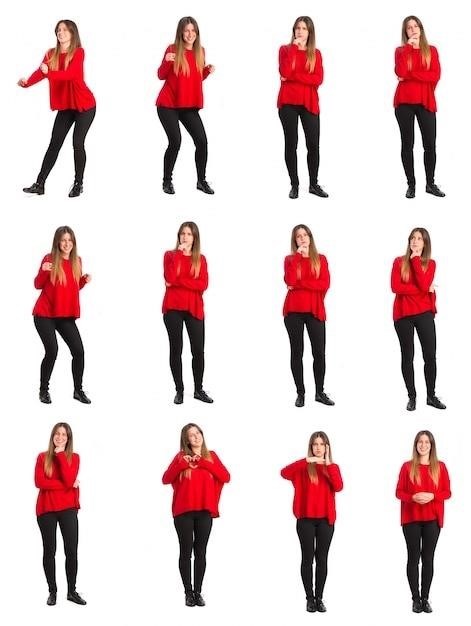
Posing Individuals⁚ Mastering Body Language and Expression
When posing individuals, focus on conveying personality and emotion through body language and facial expressions. Guide your subject to subtly shift their weight onto one leg, creating a more relaxed and natural stance. Encourage them to engage their core muscles for improved posture. The angle of the head and body can significantly impact the overall look. A slight turn of the head or a tilt can add intrigue. For a more approachable feel, have them turn slightly towards the camera, engaging their eyes directly. To elicit genuine emotion, suggest thoughts or memories that might bring a natural smile or a pensive expression. Experiment with hand placement to enhance the pose; hands in pockets can appear casual, while clasped hands convey calmness. Remember, subtle movements can make a world of difference in the final image. Pay attention to the interaction between the subject’s body and the surrounding environment, using it to create a cohesive and visually appealing composition.
Posing Pairs and Groups⁚ Creating Dynamic Interactions
Photographing pairs and groups requires skillful direction to capture genuine interactions and avoid stiff, posed looks. Encourage natural engagement between subjects. Suggest playful interactions, such as a shared glance or a light touch. Varying the distances between individuals creates visual interest. Consider arranging subjects in a staggered formation or using overlapping poses to add depth and visual complexity. When working with groups, use leading lines or natural formations within the environment to guide the viewer’s eye. To ensure everyone is well-lit and in focus, consider adjusting your camera settings or using lighting equipment. Remember to capture candid moments in between posed shots. These spontaneous interactions often reveal authentic emotions and create memorable images. Varying the heights and positions of individuals within the group adds dynamism and prevents a monotonous arrangement. Direct attention to body language; ensure subjects are facing each other or interacting in a way that feels natural and engaging.
Posing Families and Children⁚ Capturing Natural Moments
Capturing natural moments with families and children requires patience and a playful approach. Forget stiff, formal poses; instead, focus on genuine interactions and spontaneous expressions. Start by engaging children in activities they enjoy—playing games, reading books, or simply interacting with each other. Use props to encourage playfulness and create natural poses. Capture candid moments between family members, such as hugs, cuddles, or shared laughter. Consider shooting from various angles—eye level for children, slightly lower for adults interacting with children, and varied angles for group shots. A wide aperture can help blur the background and draw attention to the subjects’ faces. Direct lighting can create harsh shadows, so consider using soft, diffused light or shooting in the shade. Work quickly; children’s attention spans are short. Be prepared to adapt your approach based on the children’s ages and personalities. Encourage parents to interact naturally with their children, fostering genuine connections. Remember, the goal is to capture authentic moments that reflect the family’s unique personality and bond. Post-processing can enhance the images by adjusting brightness, contrast, and saturation. The result will be authentic and heartwarming family portraits.
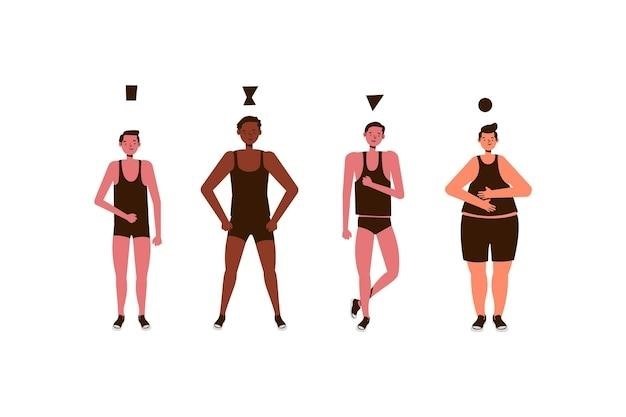
Posing Men⁚ Techniques for Flattering and Powerful Poses
Flattering and powerful poses for men go beyond simple standing shots. Consider their body type and build when choosing poses. For a classic, strong look, suggest a slight lean, shifting weight to one leg, with shoulders relaxed but not slumped. Encourage good posture to elongate the body and create a confident stance. Hands can be used naturally—in pockets, resting on hips, or holding an object. Avoid stiff, formal poses that feel unnatural. Instead, encourage relaxed yet purposeful movements. Experiment with angles; a three-quarter turn can be more flattering than a full frontal shot, creating depth and visual interest. For a more casual look, suggest a relaxed pose with arms crossed or leaning against something. To convey power and authority, use strong lines and angles; A slight head tilt can soften the expression. The environment plays a significant role; incorporate props and backgrounds to enhance the overall feel of the photograph. Pay attention to clothing and accessories; ensure they are well-fitting and complement the chosen poses. Remember to communicate clearly and provide constructive feedback throughout the session. The goal is to create images that showcase the subject’s personality and strengths. Post-processing can enhance the final product but shouldn’t replace skillful posing.
Posing Women⁚ Highlighting Grace and Femininity
Capturing a woman’s grace and femininity involves more than just pretty smiles. It’s about understanding posture, movement, and how to emphasize curves and features. Encourage soft, flowing movements rather than rigid poses. Suggest poses that accentuate the natural curves of the body, avoiding anything that might appear unnatural or forced. A slight bend in the knees or a gentle sway of the hips can add elegance. Hand placement is key; consider having hands placed on hips, lightly touching the face, or holding a prop. Experiment with different angles – a three-quarter turn often flatters the figure. Utilize props, such as flowers or fabric, to add visual interest and enhance the feminine aesthetic. Consider the clothing; flowing fabrics can contribute to a sense of grace. The lighting should be soft and flattering, avoiding harsh shadows that might detract from the overall mood. Engage your subject in conversation to help them relax and feel comfortable, leading to more natural expressions. Guide them subtly; avoid overly directing or controlling. The aim is to create a collaboration where the subject feels empowered and confident. Remember to celebrate individual beauty and avoid imposing unrealistic beauty standards. The final images should reflect the subject’s unique personality and inner radiance.
Posing Couples⁚ Capturing Intimacy and Connection
Photographing couples requires capturing not just their physical closeness, but also their emotional connection. Start by creating a comfortable and relaxed atmosphere. Encourage genuine interaction; have them hold hands, whisper in each other’s ears, or share a laugh. Avoid stiff, posed shots; instead, aim for candid moments that reflect their relationship’s true essence. Vary the distance between the couple; sometimes close proximity emphasizes intimacy, while other times a slight separation can create a sense of longing or playful interaction. Consider incorporating physical touch; a gentle hand on the shoulder, a hug, or a tender embrace can all convey emotional connection. Experiment with different angles and perspectives; shooting from slightly below can create a more flattering and romantic look. The use of leading lines within the environment can draw the viewer’s eye to the couple, further emphasizing their connection. Guide their poses subtly, suggesting adjustments rather than dictating specific positions. Incorporate elements of the environment to enhance the narrative; have them lean against a wall, sit together on a bench, or stroll hand-in-hand through a scenic location. Remember, the goal is to showcase the unique bond between the couple, reflecting their individual personalities and shared affection. The most successful images will feel authentic and emotive.
Utilizing the Environment⁚ Leveraging Props and Backgrounds
Transform ordinary photos into extraordinary storytelling through the strategic use of the environment. Backgrounds should complement your subjects, not distract from them. A cluttered background can detract from the focus, while a clean, uncluttered space allows your subject to shine. Consider the color palette; harmonious colors create a pleasing visual effect. Use leading lines to guide the viewer’s eye towards your subject. Props can add personality and context to your images. A vintage book, a musical instrument, or even a simple flower can significantly enhance a photograph. Incorporate natural elements like trees, rocks, or water. These elements can add depth and visual interest, enhancing the overall mood. For indoor shoots, utilize architectural details like arches or staircases to create depth and dimension. Think about how light interacts with the environment; soft, diffused light can create a romantic atmosphere, while harsh sunlight can add drama. Remember, the environment is not just a backdrop; it’s an integral part of the overall composition. Carefully selecting and utilizing these elements will elevate your photographs from simple snapshots to evocative visual narratives. Experiment with different locations and props to discover how they can enhance your storytelling. The key is to allow the environment to complement and enhance the mood and narrative of your photograph.
Advanced Posing Techniques⁚ Creating Visual Interest and Depth
Elevate your portraiture with advanced posing techniques that add depth and visual intrigue. Mastering these techniques transforms your images from snapshots to works of art. Explore the rule of thirds, placing your subject off-center to create a more dynamic composition. Experiment with negative space, using empty areas to draw attention to your subject and create a sense of balance. Utilize leading lines – paths, roads, or fences – to guide the viewer’s eye towards your subject, creating a sense of movement and depth. Varying poses adds dynamism; avoid static poses that lack energy. Encourage your subjects to interact with their environment; leaning against a wall, sitting on a rock, or holding an object can create natural-looking poses. Consider using foreshortening, where a part of the body is positioned closer to the camera, creating depth and visual interest. Play with angles; shooting from a low or high angle can dramatically alter the mood and perspective of your image. Mastering body language is crucial; subtle shifts in posture can convey emotions and add layers to your photographs. Remember, even minor adjustments in pose can significantly impact the final image. Continuous experimentation and keen observation will refine your skills in creating compelling and visually rich portraits.
Working with Different Body Types⁚ Flattering Every Figure
Mastering the art of flattering diverse body types is key to creating inclusive and empowering portraits. Understanding how to pose individuals of different shapes and sizes ensures everyone feels confident and beautiful. For curvier figures, emphasize the waistline by posing with a slight curve or using strategic hand placement. Avoid poses that might accentuate perceived flaws; instead, choose angles and positions that highlight the subject’s best features. For slender individuals, add volume by using props, layering clothing, or suggesting movement in the pose. Experiment with different angles and perspectives to create a dynamic and visually interesting image. Remember that posing is about showcasing the subject’s personality and confidence. Encourage natural postures; rigidity often looks unnatural in photographs. Consider the clothing; well-chosen attire can help create a balanced and harmonious look. Use lighting strategically; soft, diffused lighting generally produces a more flattering effect than harsh, direct light. Above all, communicate with your subject, building a comfortable and trusting relationship. This fosters natural poses and genuine expressions, resulting in photos that are both aesthetically pleasing and emotionally resonant. Remember, every body is beautiful; your role is to highlight this inherent beauty through skilled posing and thoughtful composition.
Posing for Specific Occasions⁚ Wedding, Portrait, and Other Styles
The approach to posing significantly changes depending on the occasion. Wedding photography demands capturing spontaneous joy and intimate moments alongside more formal, posed shots. Consider the setting – a grand ballroom versus a rustic barn – and adapt your posing to complement the environment. For portraits, the goal is often to showcase personality and individuality. Direct your subject’s gaze, posture, and hand placement to achieve the desired mood – playful, serious, or contemplative. Headshots require a different approach, focusing on clear facial expressions and professional demeanor. Event photography necessitates capturing candid shots that reflect the event’s energy, but also incorporating posed group photos for formal records. Fashion photography demands a more stylized approach, emphasizing dramatic poses and the clothing’s aesthetic. Product photography requires precise positioning to highlight the product’s features. Always consider the lighting, background, and overall composition to ensure the photos align with the occasion’s style and purpose. Pre-planning and communication with your subject are paramount to successfully capturing the essence of each unique event. Remember to be flexible and adapt your approach based on the specific needs and preferences of your client.
Essential Camera Settings for Portrait Photography
Mastering camera settings is crucial for achieving professional-looking portraits. Begin by selecting a wide aperture (low f-stop number, like f/1.4 to f/2.8) to create a shallow depth of field, blurring the background and focusing attention on your subject. This technique beautifully isolates your subject, making them stand out. Next, consider your ISO. Keep it as low as possible (ISO 100-400) to minimize image noise, especially in low-light conditions. A higher ISO can introduce unwanted grain, compromising image quality. Your shutter speed should be fast enough to prevent motion blur, especially if your subject is moving or you’re shooting handheld. A general guideline is to use a shutter speed faster than your lens’s focal length (e.g., 1/200th of a second for a 200mm lens). Experiment with different white balance settings to ensure accurate color representation. Auto white balance usually works well, but manual adjustments can be beneficial in specific lighting situations. Finally, use your camera’s metering modes to accurately expose your shots. Spot metering is useful for focusing on a specific area, while evaluative or matrix metering assesses the entire scene. Remember to review your images frequently and adjust settings as needed to achieve your desired aesthetic. Practice is key to mastering these settings and creating stunning portraits.