Free End Table Plans PDF: An Overview
Discover a wealth of free DIY end table plans in PDF format, offering step-by-step guidance for builders of all skill levels.
Explore diverse designs, from simple plywood builds to rustic farmhouse styles, readily available online for immediate download and project commencement.
Unlock creative potential and furnish your home with custom-made end tables, saving money and enjoying the satisfaction of handmade furniture.
Embarking on a DIY end table project is a fantastic entry point into the world of woodworking, offering both creative fulfillment and cost savings. Free end table plans, often available as PDFs, democratize furniture making, allowing anyone to construct stylish and functional pieces.
These plans cater to various skill levels, from beginner-friendly designs utilizing simple plywood construction to more intricate projects involving solid wood and advanced joinery. Building your own end table provides a unique opportunity to customize dimensions, finishes, and features to perfectly complement your living space.
The accessibility of free plans removes financial barriers, making woodworking a viable hobby for many, and fostering a sense of accomplishment upon completion.
Why Choose a PDF Plan?
PDF plans offer unparalleled convenience and accessibility for DIY end table builders. They are easily downloadable, printable, and viewable on any device, eliminating the need for costly physical plans or unreliable online tutorials.
PDF format ensures consistent formatting and clarity, presenting detailed instructions, cutting lists, and visual diagrams in a standardized manner. This facilitates easy comprehension and minimizes errors during the building process.
Furthermore, PDFs are readily shareable and storable, allowing you to build multiple tables or revisit the plan for future projects with ease.
Types of Free End Table Plans Available
Explore a diverse range of free end table plans, including simple plywood designs, stylish X-leg tables, rustic farmhouse options, and modern minimalist creations.
Find plans catering to various skill levels and aesthetic preferences, enabling you to build the perfect end table for your home.
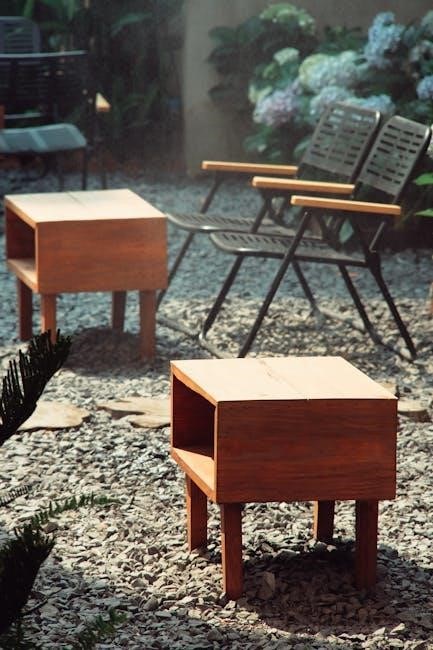
Simple Plywood End Table Plans
Plywood end table plans are incredibly popular due to their affordability and ease of construction, often utilizing just a quarter sheet of plywood.
These plans typically involve straightforward cuts and assembly, making them ideal for beginner woodworkers seeking a quick and satisfying project.
Many free resources offer detailed instructions and cutting lists, enabling you to build a functional and stylish end table for around $10 in materials.
Expect designs ranging from basic square tables to slightly more elaborate options with simple shelf additions, perfect for maximizing space and utility.
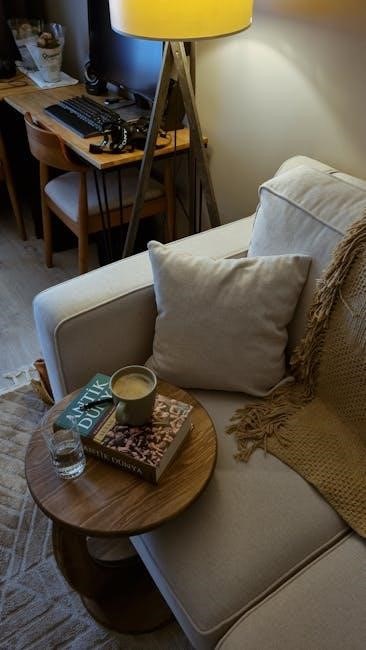
X-Leg End Table Plans
X-leg end table plans offer a touch of rustic charm and visual interest to any living space, often featuring a minimalist design.
Free plans commonly showcase a tall and skinny profile with two shelves, providing both style and practical storage solutions.
Construction typically involves creating the X-shaped legs from plywood or solid wood, then attaching them to a tabletop and lower shelf.
These plans are moderately challenging, requiring accurate cuts and secure joinery, but yield a beautiful and sturdy end table.
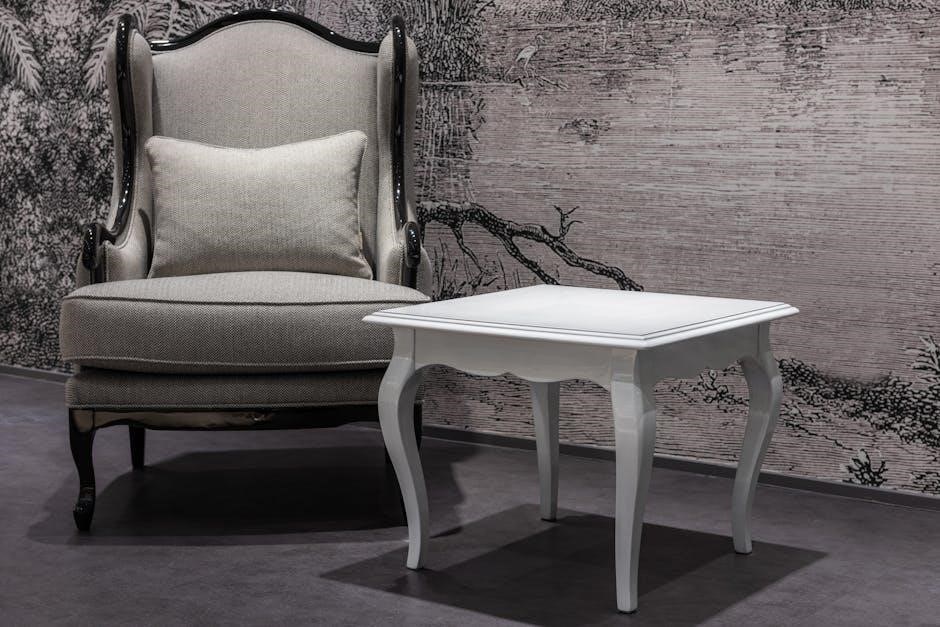
Rustic Farmhouse End Table Plans
Rustic farmhouse end table plans evoke a cozy, inviting atmosphere with their distressed finishes and simple, sturdy construction.
Free PDF plans often feature designs incorporating reclaimed wood or techniques to mimic a weathered appearance, enhancing the farmhouse aesthetic.
Common elements include chunky legs, spacious tabletops, and optional lower shelves for added storage and display space.
These plans are generally beginner-friendly, focusing on straightforward assembly and emphasizing the natural beauty of the wood.
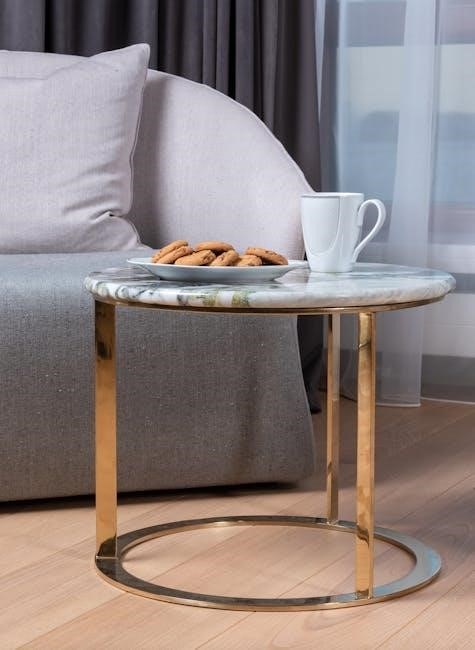
Modern Minimalist End Table Plans
Modern minimalist end table plans prioritize clean lines, simple forms, and a lack of ornamentation, fitting seamlessly into contemporary interiors.
Free PDF resources showcase designs utilizing sleek materials like plywood or solid wood with a focus on functionality and understated elegance.
Expect plans featuring geometric shapes, tapered legs, and a neutral color palette, often emphasizing negative space and visual lightness.
These projects are ideal for those seeking a sophisticated, uncluttered look, often requiring precise cuts and careful finishing techniques.
Resources for Finding Free PDF Plans
Explore Popular Mechanics, Layout.Computer, Pinterest, and library resources like Norm Abrams’ books to uncover a diverse collection of free end table plans in PDF format.
Popular Mechanics Articles & Backyard Picnic Tables
Surprisingly, inspiration can be found in unexpected places! A Google Books link references a Popular Mechanics article detailing backyard picnic table construction.
While not directly end table plans, the principles of construction – cutting, assembly, and fastening – are universally applicable.
This resource provides a solid foundation for understanding basic woodworking techniques, offering a readily accessible reference guide for DIY enthusiasts.
Adapting these picnic table plans, or utilizing the skills learned, can empower builders to create their own unique end table designs;
It’s a fantastic starting point for those seeking practical, hands-on guidance.
Layout.Computer for Casework Plans
Layout.Computer emerges as a powerful online tool for generating casework plans, potentially adaptable for end table construction.
The provided link showcases a quick example, demonstrating the platform’s ability to create detailed layouts and cutting lists.
Users can customize dimensions and configurations, tailoring plans to their specific end table design preferences.
Although not exclusively focused on end tables, the software’s flexibility allows for the creation of bespoke plans, offering a digital alternative to traditional methods.
It’s a valuable resource for visualizing and planning your project before cutting any wood.
Pinterest Inspiration for Side Tables
Pinterest serves as a vibrant hub for free side table plans and design inspiration, offering a vast collection of user-submitted projects.
Explore numerous images and links to external resources, including blog posts and downloadable PDFs with step-by-step instructions.
Discover a diverse range of styles, from minimalist modern designs to rustic farmhouse creations, catering to various tastes and skill levels.
The platform’s visual nature allows for easy browsing and idea gathering, sparking creativity for your own end table build.
With over 10 people actively searching for ideas, it’s a great place to start!
Library Resources: Norm Abrams’ “The New Yankee Workshop”
While directly free PDF plans may be limited, Norm Abrams’ “The New Yankee Workshop” book (1989) offers a wealth of woodworking projects, including end table designs.
Libraries and used bookstores provide affordable access to this valuable resource, containing detailed plans and instructions for various furniture builds.
Though not a digital download, the book presents a cost-effective alternative, offering numerous plans within a single purchase.
Supplement your search with other library resources, exploring additional woodworking books and magazines for further inspiration.
This approach expands your options beyond solely PDF formats.

Essential Tools for Building End Tables
Successfully executing free end table plans requires fundamental tools: saws, drills, screwdrivers, measuring tapes, and squares.
Prioritize safety with eye protection and gloves, ensuring accurate cuts and secure assembly for a professional finish.
Safety Gear: Eye Protection & Gloves
When embarking on end table projects using free plans, prioritizing safety is paramount. Always wear safety glasses or goggles to shield your eyes from flying debris generated during cutting, sanding, and fastening processes.
Woodworking can produce splinters and rough edges, making gloves essential for protecting your hands.
Consider using work gloves that offer both protection and dexterity, allowing for precise handling of tools and materials.
A dust mask is also recommended, especially when sanding, to prevent inhalation of wood particles. Remember, a safe workspace is a productive workspace!
Cutting Tools: Saws (Circular, Hand, Jigsaw)
Successfully executing free end table plans relies on appropriate cutting tools. A circular saw excels at straight, accurate cuts for larger plywood or solid wood pieces, ensuring efficient material breakdown.
For intricate curves or detailed designs, a jigsaw proves invaluable, offering maneuverability and precision.
A hand saw remains a useful tool for smaller adjustments or when power tools aren’t practical.
Ensure blades are sharp and appropriate for the material to achieve clean, safe cuts, vital for a professional finish.
Fastening Tools: Screwdrivers, Drills, Nail Guns
Building from free end table plans necessitates reliable fastening tools. A drill, equipped with various bits, is essential for pilot holes and driving screws, ensuring secure joints.
Screwdrivers – both manual and powered – offer control for detailed assembly, particularly when precision is paramount.
Nail guns expedite the process of joining wood components, though screws generally provide superior holding power for lasting durability.
Select appropriate fasteners based on wood type and plan specifications.
Measuring & Marking Tools: Tape Measure, Square
Accuracy is paramount when working with free end table plans; therefore, precise measuring and marking tools are crucial. A reliable tape measure ensures correct wood dimensions, preventing costly errors.
A combination square verifies angles and ensures square cuts, vital for stable construction.
Marking tools, like pencils and marking gauges, clearly delineate cut lines and assembly points.
Double-checking measurements before cutting minimizes mistakes and guarantees a professional finish.

Materials Commonly Used in End Table Construction
Common materials for free end table plans include plywood, pine, oak, and maple. Essential hardware comprises screws, nails, and wood glue for robust assembly.
Finishing supplies like stain, paint, and varnish enhance aesthetics and durability.
Plywood Options & Grades
Plywood is a frequently utilized material in free end table plans due to its affordability and workability. Various grades are available, impacting both cost and appearance. Cabinet-grade plywood, offering a smooth surface, is ideal for visible parts, while construction-grade suffices for hidden components.
Consider the thickness; ¼ inch is suitable for lightweight tables, while ¾ inch provides greater stability. Hardwood plywood, like birch or maple, offers superior strength and a more refined look compared to softwood options. Always check for voids or defects before purchasing, ensuring a quality build.
Solid Wood Choices (Pine, Oak, Maple)
Solid wood elevates end table builds, offering durability and aesthetic appeal. Pine is a cost-effective, easily workable option, perfect for rustic or painted finishes. Oak provides exceptional strength and a classic grain pattern, ideal for staining.
Maple, known for its hardness and smooth texture, is excellent for modern designs. Consider wood availability and price when selecting. Kiln-dried lumber minimizes warping, ensuring a stable tabletop and legs.
Hardware: Screws, Nails, Wood Glue
Essential hardware secures your end table’s structure. Screws offer superior holding power, particularly for frame assembly and tabletop attachment. Choose screw lengths appropriate for wood thickness to prevent breakthrough. Nails are suitable for attaching non-structural elements, like decorative trim.
Wood glue, used in conjunction with fasteners, creates robust joints. Select a glue type compatible with your chosen wood. Ensure proper clamping during glue drying for maximum strength and a lasting build.
Finishing Supplies: Stain, Paint, Varnish
Finishing protects and enhances your end table’s appearance. Stain penetrates the wood, highlighting its grain while adding color. Paint provides opaque coverage, allowing for vibrant hues and a uniform look.
Varnish or polyurethane creates a durable topcoat, shielding against scratches, moisture, and wear. Consider oil-based or water-based options based on desired sheen and drying time. Proper surface preparation is key for optimal finish adhesion and longevity.
Step-by-Step Building Process (General Guide)
Follow your chosen PDF plan’s instructions, starting with precise wood cutting. Assemble the frame and legs, then securely attach the tabletop. Sand thoroughly before applying your desired finish.
Cutting the Wood According to Plans
Precise wood cutting is paramount when utilizing free end table plans. Carefully review the PDF’s cutting list, noting dimensions for each piece. Employ appropriate saws – circular, hand, or jigsaw – ensuring clean, accurate cuts.
Double-check measurements before each cut to minimize errors and waste. Prioritize safety by wearing eye protection and utilizing a stable work surface. Consider grain direction for aesthetic appeal and structural integrity. Label each cut piece according to the plan for easy assembly, streamlining the building process and reducing confusion.
Assembling the Frame & Legs
Begin assembling the end table frame and legs, referencing your chosen free PDF plan for guidance. Utilize screws, wood glue, or nails – as specified – to create strong, secure joints; Ensure squareness throughout the process, employing a square tool for accurate alignment.
Clamp pieces together while the glue dries for maximum stability. Pre-drill holes to prevent wood splitting, especially with hardwoods. Regularly check for levelness and make adjustments as needed, guaranteeing a sturdy and visually appealing foundation for your end table.
Attaching the Tabletop
Carefully position the tabletop onto the assembled frame and legs, ensuring proper alignment according to your free PDF plan. Secure the tabletop using screws, driven from underneath the frame into the tabletop’s surface. Consider using wood glue in addition to screws for enhanced stability and a seamless bond.
Countersink the screws to create a flush surface, preparing for finishing. Double-check the tabletop’s stability and make any necessary adjustments before proceeding. A well-attached tabletop is crucial for the end table’s overall durability and functionality.
Sanding & Preparing for Finishing
Begin with coarser grit sandpaper (80-120) to remove any imperfections, sharp edges, or glue residue from your newly assembled end table. Progress to finer grits (150-220) for a smooth, even surface, essential for optimal finish adhesion. Thoroughly remove all sanding dust with a tack cloth or vacuum.
Inspect the wood for any remaining flaws and address them. Proper surface preparation guarantees a professional-looking finish and enhances the longevity of your DIY end table project.
Finishing Techniques for End Tables
Transform your completed end table with staining, painting, or varnishing, enhancing its beauty and protecting the wood.
Choose a finish that complements your style and provides lasting durability for years of enjoyment.
Staining for a Rich Wood Tone
Achieving a rich wood tone through staining elevates the aesthetic of your DIY end table, highlighting the natural grain and adding warmth. Begin with proper surface preparation – sanding is crucial for even stain absorption.
Select a stain color that complements your décor, considering options ranging from light oak to deep mahogany.
Apply the stain evenly with a brush or cloth, following the wood grain, and wipe off excess stain after the recommended dwell time.
Multiple coats can deepen the color, but allow each coat to dry completely before applying the next, ensuring a beautiful, lasting finish.
Painting for Color & Protection
Painting your DIY end table offers vibrant color options and a protective layer against wear and tear. Start with a primer to ensure proper paint adhesion and a uniform finish.
Choose a high-quality paint suited for wood, considering latex or acrylic options for durability.
Apply thin, even coats with a brush or sprayer, allowing each coat to dry thoroughly before applying the next.
Multiple coats provide better coverage and protection, resulting in a professional-looking, colorful, and long-lasting end table.
Applying Varnish or Polyurethane for Durability
Varnish or polyurethane provides a robust, protective finish for your handcrafted end table, enhancing its longevity and resistance to scratches and moisture.
Select an oil-based or water-based option, considering the desired sheen – satin, semi-gloss, or gloss.
Apply several thin coats, sanding lightly between each application for a smooth surface.
Proper application ensures a durable, beautiful finish that safeguards your investment and preserves the wood’s natural beauty for years to come.
Customization Options
Personalize your end table with drawers, shelves, or unique hardware, adding functional storage and distinctive style.
Distressing techniques create a vintage aesthetic, while custom paint or stain colors reflect your individual taste.
Adding Drawers or Shelves
Enhance the functionality of your free end table plan by incorporating drawers or shelves for concealed storage. Consider the table’s overall design and ensure the additions complement its aesthetic.
Drawers are ideal for storing remote controls, books, or other small items, keeping your living space organized. Shelves provide open storage for displaying decorative objects or holding frequently used items.
Carefully measure and plan the placement of drawers or shelves to maintain structural integrity and visual balance. Utilize readily available drawer slides and shelf supports for smooth operation and secure installation.
Incorporating Unique Hardware
Elevate your free end table project with distinctive hardware choices, transforming a simple build into a statement piece. Explore antique knobs, modern pulls, or custom-made handles to reflect your personal style.
Hardware isn’t merely functional; it’s a design element that can dramatically alter the table’s appearance. Consider finishes like brushed nickel, oil-rubbed bronze, or polished chrome to complement the wood and overall aesthetic.
Don’t limit yourself to standard options – search for unique finds at flea markets or online retailers to add a truly personalized touch.
Distressing for a Vintage Look
Achieve a charming, timeworn aesthetic with distressing techniques applied to your DIY end table. Employ methods like light sanding on edges and surfaces to reveal the wood grain and create a naturally aged appearance.
Experiment with techniques like dry brushing or applying a thin wash of paint, then wiping it away to highlight details and add depth. Consider using steel wool for subtle distressing effects.
Distressing adds character and personality, transforming a new build into a piece that feels like a treasured antique.
Troubleshooting Common Building Issues
Address wood splintering with careful sanding and sealing. Ensure square, level construction using a square and shims. Repair gaps with wood filler and clamps for a flawless finish.
Dealing with Wood Splintering
Wood splintering can be a frustrating issue when working with free end table plans, particularly with plywood. Prevent this by using sharp blades during cutting, minimizing tear-out.
Always sand edges thoroughly with progressively finer grits, smoothing any rough areas. Apply wood conditioner before staining or painting to help seal the wood fibers.
For existing splinters, carefully remove them with pliers or a sharp knife, then sand the area smooth. Consider using wood filler for larger damaged areas, followed by sanding and finishing.
Ensuring Square & Level Construction
Achieving square and level construction is crucial when following free end table plans. Utilize a carpenter’s square consistently during assembly, checking angles at every stage.
Employ clamps to hold pieces firmly together while glue dries, preventing shifting. Regularly check for squareness using diagonal measurements – they should be equal.
A level surface is essential; use shims if needed. Address any discrepancies immediately to avoid compounding errors throughout the build process, ensuring a stable final product.
Fixing Gaps & Imperfections
When working with free end table plans, minor gaps and imperfections are common. Utilize wood filler to address small voids, allowing it to dry completely before sanding smooth.
For larger gaps, consider wood shims or carefully fitted wood pieces, glued and clamped in place. Inspect joints closely; re-tighten screws if needed.
Sanding is key to concealing blemishes; progress through grits for a flawless finish. Embrace imperfections as character, or skillfully conceal them for a polished look.

Cost Considerations for DIY End Tables
DIY end tables, using free plans, are generally cheaper than store-bought options. Factor in material costs, like plywood or wood, and tool investments for savings.
Comparing Material Costs
Evaluating material expenses is crucial when utilizing free end table plans. Plywood options, like a quarter sheet costing around $10, present a budget-friendly starting point for simple designs.
Solid wood choices—pine, oak, or maple—will significantly increase costs, varying based on grade and quantity. Hardware, including screws, nails, and wood glue, adds to the total, typically ranging from $10-$30.
Consider finishing supplies; stain, paint, and varnish contribute additional expenses. Comparing these costs against pre-made table prices helps determine the true savings of a DIY project.
Tool Investment vs. Buying Pre-Made
Embarking on DIY end table construction necessitates evaluating tool costs. Essential tools – saws, drills, sanders, and safety gear – represent an initial investment.
Existing tool ownership lowers this barrier, while purchasing new tools can range from $100 to $500+, depending on quality and quantity.
Compare this investment to the cost of a comparable pre-made end table. Factor in the value of a custom-built piece and the satisfaction of craftsmanship when assessing the overall financial benefit.

Where to Find More Advanced Plans
Elevate your woodworking with specialized websites, online communities, and detailed books like Norm Abrams’ “The New Yankee Workshop” for intricate designs.
Explore woodworking magazines and resources to unlock complex end table plans beyond basic PDF options.
Online Woodworking Communities
Engage with passionate woodworkers in thriving online forums and communities dedicated to sharing plans and expertise. These platforms often host user-submitted end table designs, offering a diverse range beyond standard PDF collections.
Benefit from collaborative problem-solving, receiving feedback on your projects and discovering innovative techniques. Websites like Reddit’s r/woodworking and dedicated woodworking forums provide access to a wealth of knowledge and downloadable plans, frequently including advanced designs and modifications.
Participate in discussions, ask questions, and contribute your own creations to foster a supportive learning environment and expand your end table building skills.
Specialized Woodworking Websites
Explore dedicated woodworking websites that curate and offer free end table plans, often categorized by skill level and style. Layout.Computer provides casework plans, including adaptable designs suitable for end tables, offering a unique digital approach to project creation.
Discover detailed instructions, material lists, and cutting diagrams designed specifically for woodworking enthusiasts. These resources frequently feature plans beyond basic designs, encompassing modern minimalist and rustic farmhouse styles.
Utilize these specialized platforms to refine your search and access high-quality, focused end table plans.
Books and Magazines on Woodworking
Delve into the wealth of knowledge found in woodworking books and magazines, often containing detailed end table plans. Norm Abrams’ “The New Yankee Workshop” (1989) is a valuable resource, offering numerous plans, though potentially requiring library or used bookstore acquisition.
Explore library collections for a diverse range of woodworking publications, providing inspiration and detailed project instructions. While not always free, these resources offer comprehensive guidance and a broader selection of designs than solely online options.
Consider these publications for in-depth learning and plan variety.
Legal Considerations & Copyright
Respect plan usage rights and licensing terms when utilizing free PDF plans. Attribute designs appropriately and understand copyright restrictions before building or sharing.
Ensure compliance with creator permissions for responsible woodworking.
Understanding Plan Usage Rights
Carefully review the terms of use associated with each free end table plan PDF before commencing your build. Many plans are offered for personal, non-commercial use only, prohibiting resale of finished products.
Some designers may require attribution, requesting credit when sharing photos or discussing your project online. Pay attention to licensing details – Creative Commons licenses, for example, dictate specific permissions and restrictions;
Always respect the intellectual property of the plan creator, avoiding unauthorized modifications or distribution of the plans themselves. Understanding these rights ensures ethical woodworking and supports the design community.
Attribution & Licensing
Proper attribution is crucial when utilizing free end table plans; acknowledge the designer’s work when showcasing your finished project online or in social media posts. Licensing dictates how you can legally use the plans – Creative Commons licenses are common.
These licenses specify whether modifications are permitted and if commercial use is allowed. Always check for specific requirements regarding crediting the original source. Respecting these guidelines fosters a positive community.
Failure to comply with licensing terms could lead to legal issues, so prioritize understanding and adhering to the plan’s stated conditions.